

Let your agent do it
Let your agent do it
To run this guide from your terminal or your coding agent, run The steps below are what the agent does, in the open.
npx checkly init in your project first. It installs the Checkly CLI and Checkly Skills for your agent. Then paste the prompt below into Claude Code, Cursor, Codex, or any agent that supports skills. It builds the same setup as this guide, proves it with npx checkly test --record, and stops for your confirmation before npx checkly deploy.Prompt
Step 1: Find what failed
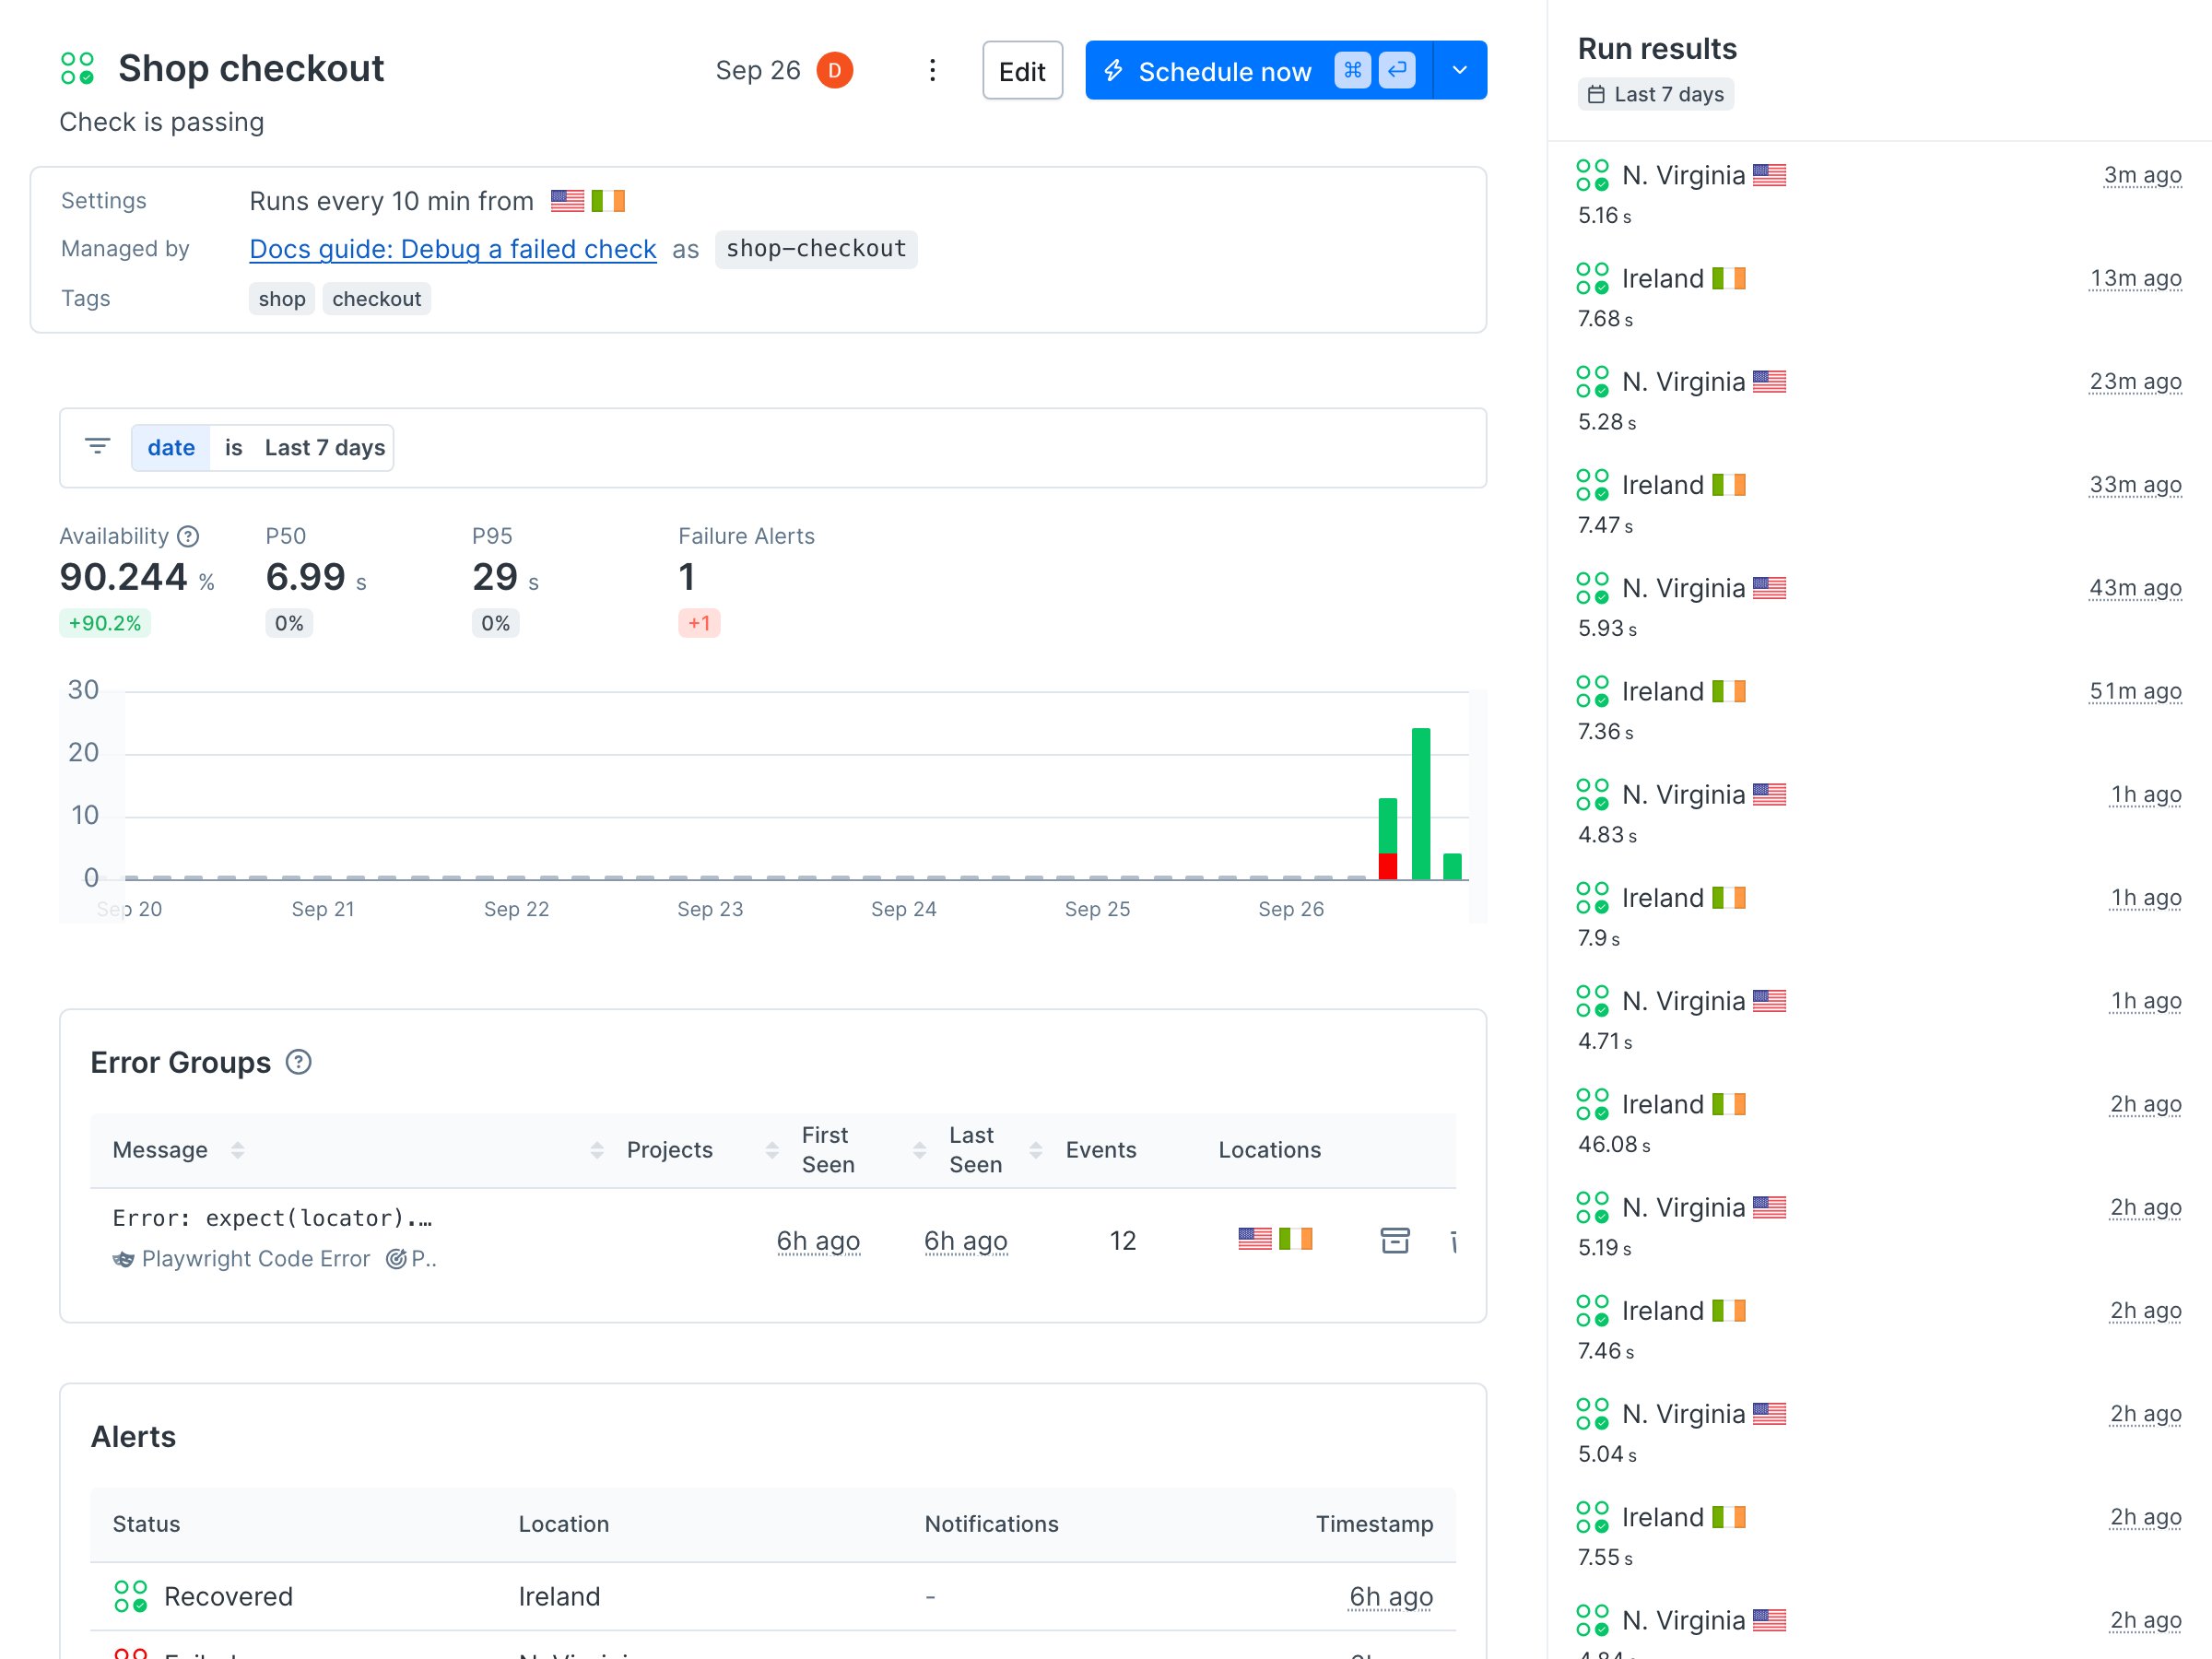
An alert tells you a check failed. Start from the terminal, not the dashboard. List the failing checks and open the one from the alert.Terminal
Terminal
Terminal
Terminal
RCA column says Rocky AI has already analyzed the group.
Step 2: Read the error and the analysis
Open the error group. It prints the full Playwright error with the failing line, and below it the root cause analysis.Terminal
Terminal
Please fill in all fields.. That is the lead.
Rocky’s conclusion is a hypothesis, and this one is wrong in a detail that matters. Open the spec: it fills name, surname, address, zipcode, and city. Checkly scrubs form input values from stored traces, so the analysis could not see them. Whenever the analysis and your code disagree, the trace decides.
Rocky analyzes every new error group automatically. To rerun it with what you know, use
npx checkly rca run --error-group <id> --user-context "..." --watch.Step 3: Look at the result
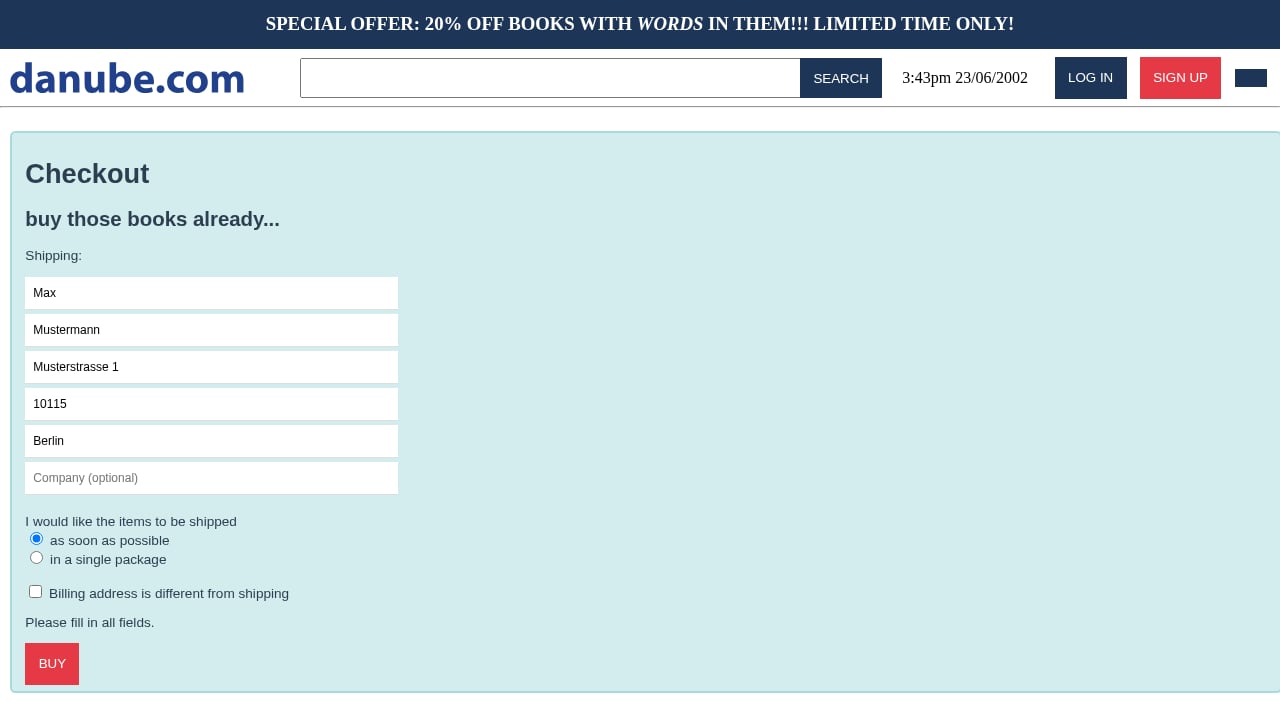
The result page has the failure screenshot, the video, and the trace viewer. It is the quickest way to see what the browser saw, and it is what the alert links to.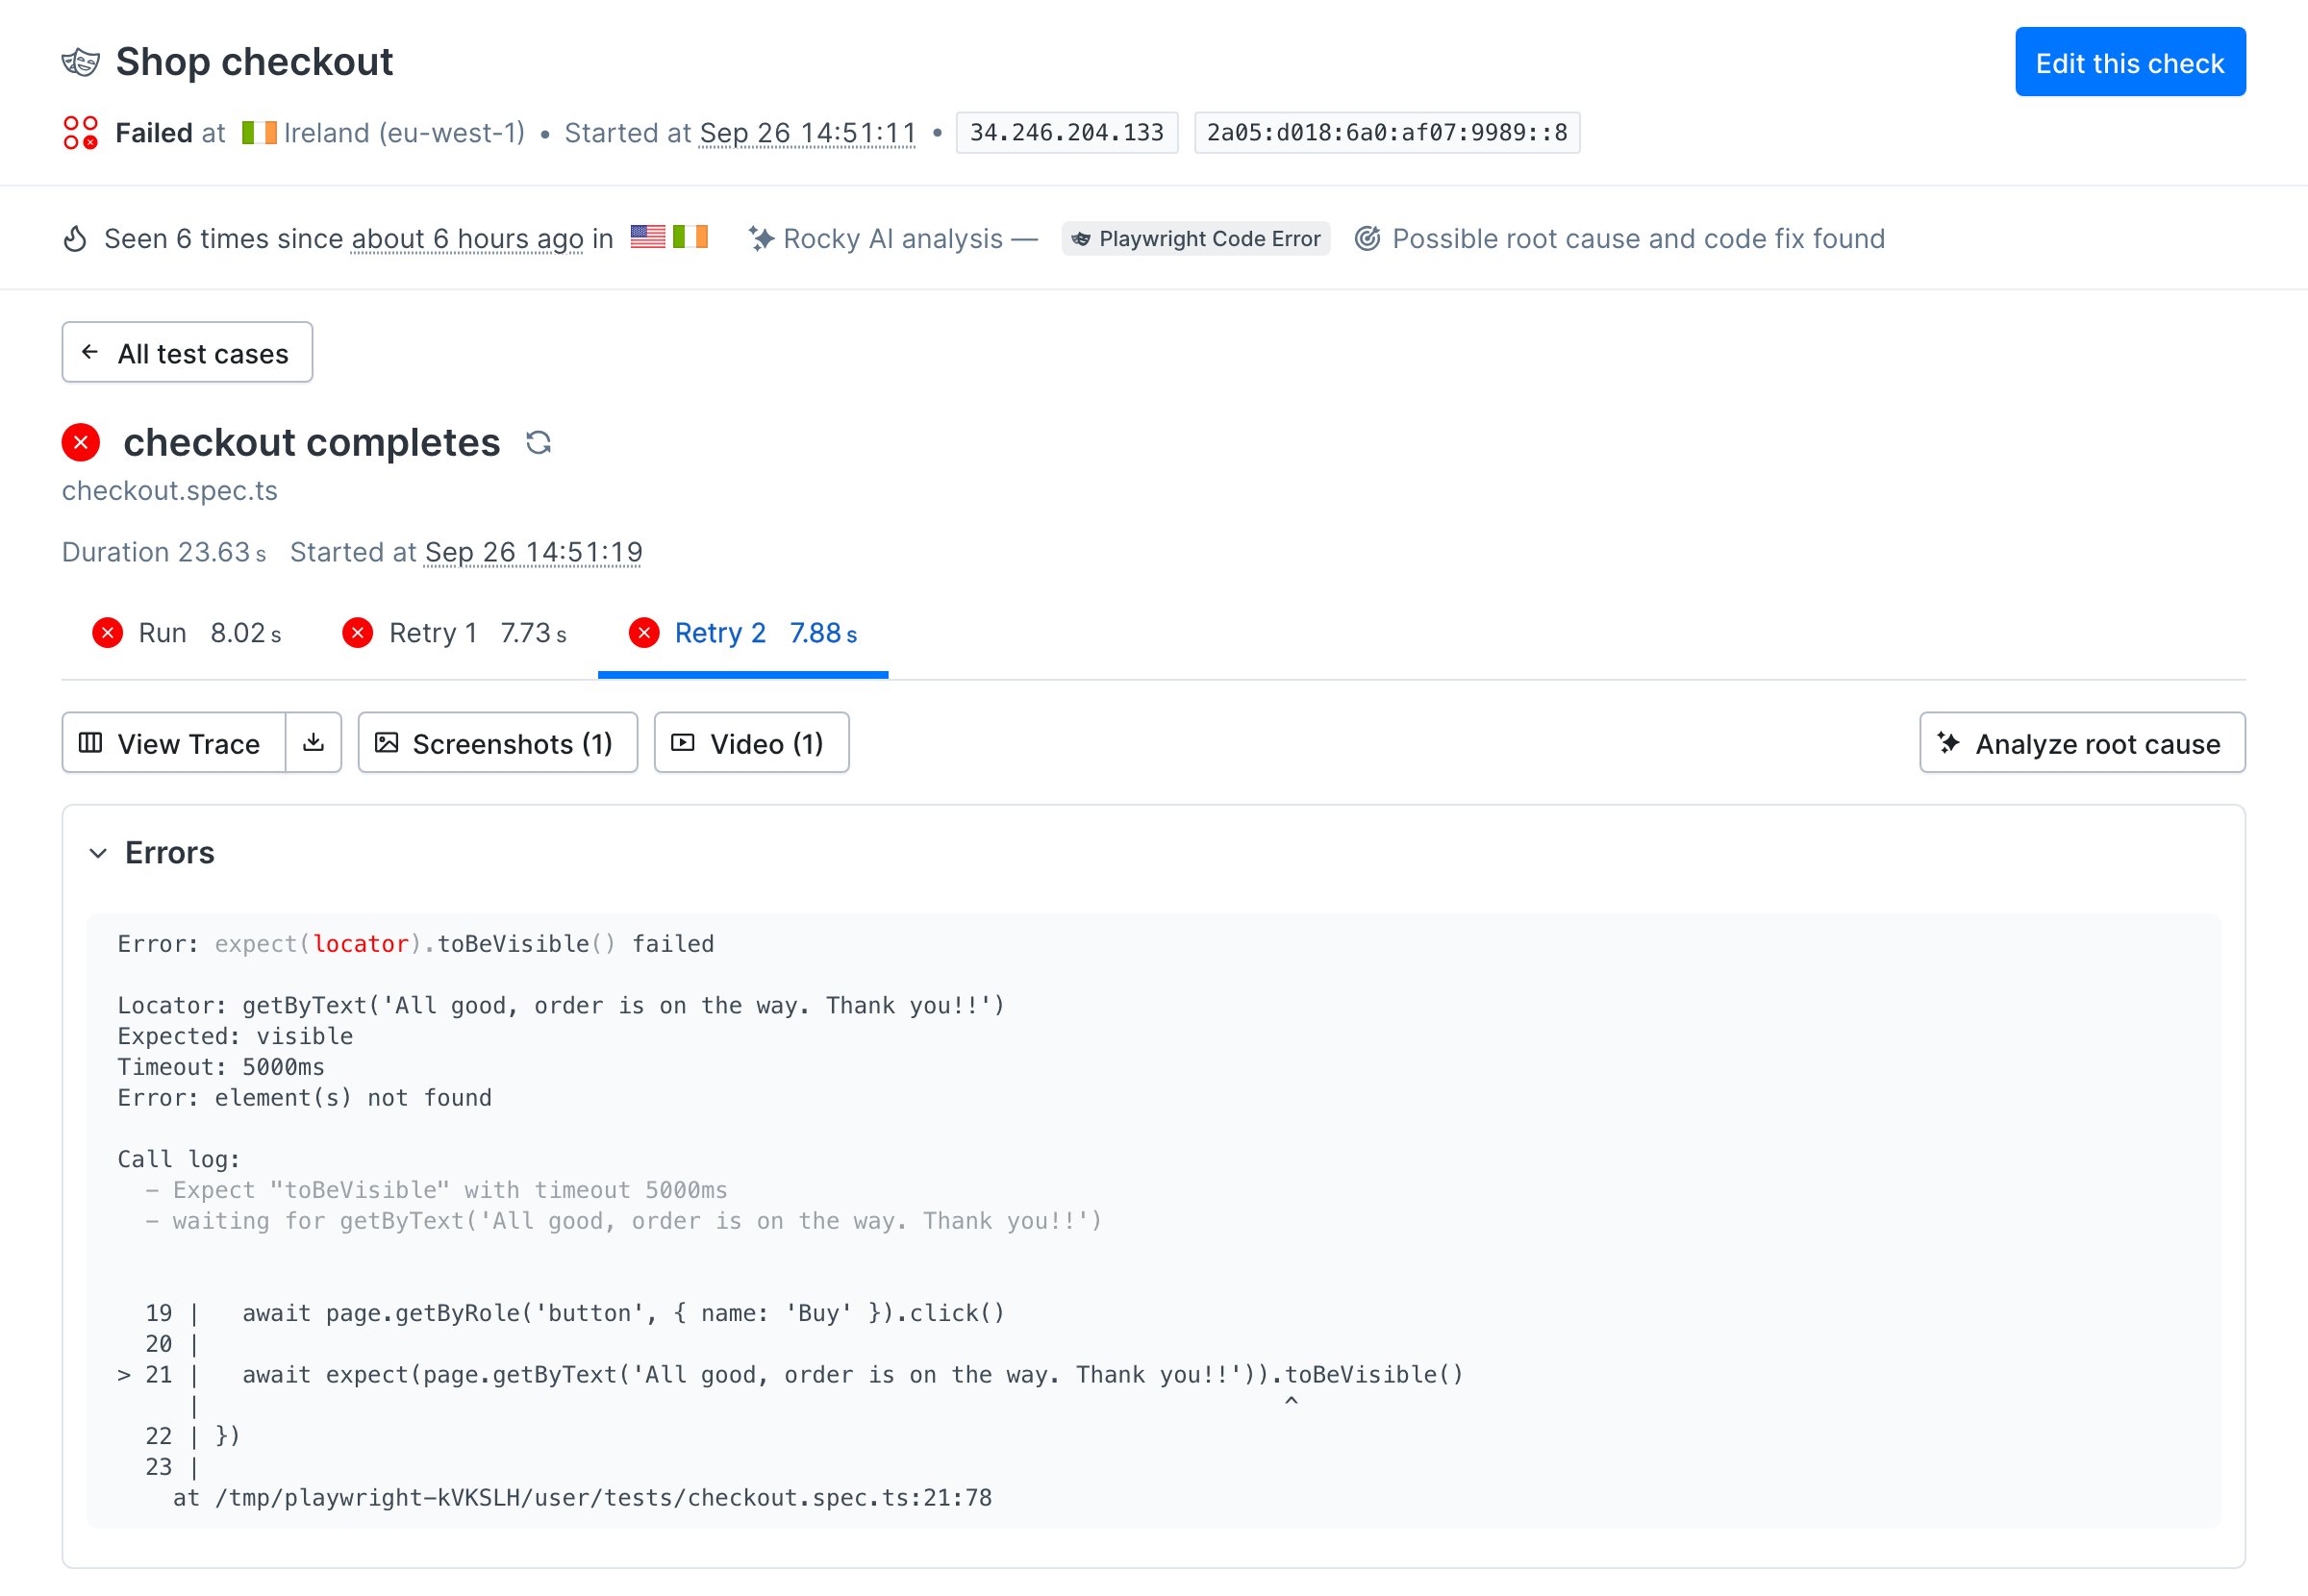
Please fill in all fields..
Step 4: Read the trace in the terminal
Download the trace for the failed result. Every asset belongs to one result, so pass the result ID and the check ID from step 1.Terminal
Terminal
Terminal
Terminal
Terminal
Terminal
books lookup, before the click. Whatever stopped the order happened in the browser, so look at the page as it was when the test failed. Playwright attaches it as error-context.
Terminal
Terminal
Please fill in all fields.. The check is doing exactly what a customer without a company would do, and that customer cannot buy. This is an application bug, not a monitoring bug.
Step 5: Confirm the diagnosis, then ship
A root cause is a claim until a change proves it. If the company field is the cause, filling it should make the check pass. Fill it, and leave a comment that says why, so nobody mistakes the workaround for the intended flow.tests/checkout.spec.ts
Terminal
Terminal
Terminal
Verify it works
Run the deployed check instead of waiting for its next scheduled run.Terminal
Terminal
Prompt
list-check-stats with the failing filter to find the check, get-error-group-root-cause-analyses to read the group and Rocky’s analysis, and list-check-result-assets when it needs the trace. It ends with the same Please fill in all fields. evidence you found in step 4.