Let your agent do it
Let your agent do it
To run this guide from your terminal or your coding agent, run The steps below are what the agent does, in the open.
npx checkly init in your project first. It installs the Checkly CLI and Checkly Skills for your agent. Then paste the prompt below into Claude Code, Cursor, Codex, or any agent that supports skills. It builds the same setup as this guide, proves it with npx checkly test --record, and stops for your confirmation before npx checkly deploy.Prompt
Step 1: Tag the checks that prove each feature works
A status page is only as honest as what drives it. Drive each component with a check that does what a user does: search for a book, call the API, and assert on the answer. The tag on each check is the contract between the check and the status page. Use one tag per component, and do not reuse it for anything else. The storefront component is backed by a search flow. Run it as a Playwright Check Suite or a Browser Check. Both use the same test file:tests/search.spec.ts
checks/books-api.check.ts
Step 2: Describe the page in code
A status page is built from components. A component is either a service with its own status and 90-day uptime, or a group that nests services under one heading and shows their average uptime. Name components after what users do, not after your architecture. Your users search for books. They do not care which pod serves the search.checks/status-page.check.ts
url becomes the subdomain, so this page is served at danube-shop-status.checkly-status-page.com. It must be unique across all Checkly accounts, so pick your own. Add customDomain when you are ready to serve it from status.yourdomain.com; see custom domains.
Step 3: Open incidents from failing checks
An automation rule connects tags to components. When a check with one of the rule’s tags fails, Checkly opens one incident with the rule’s first update and sets each listed component to its impact. When the check recovers, Checkly posts the last update and resolves the incident. Add the rules to the same file:checks/status-page.check.ts
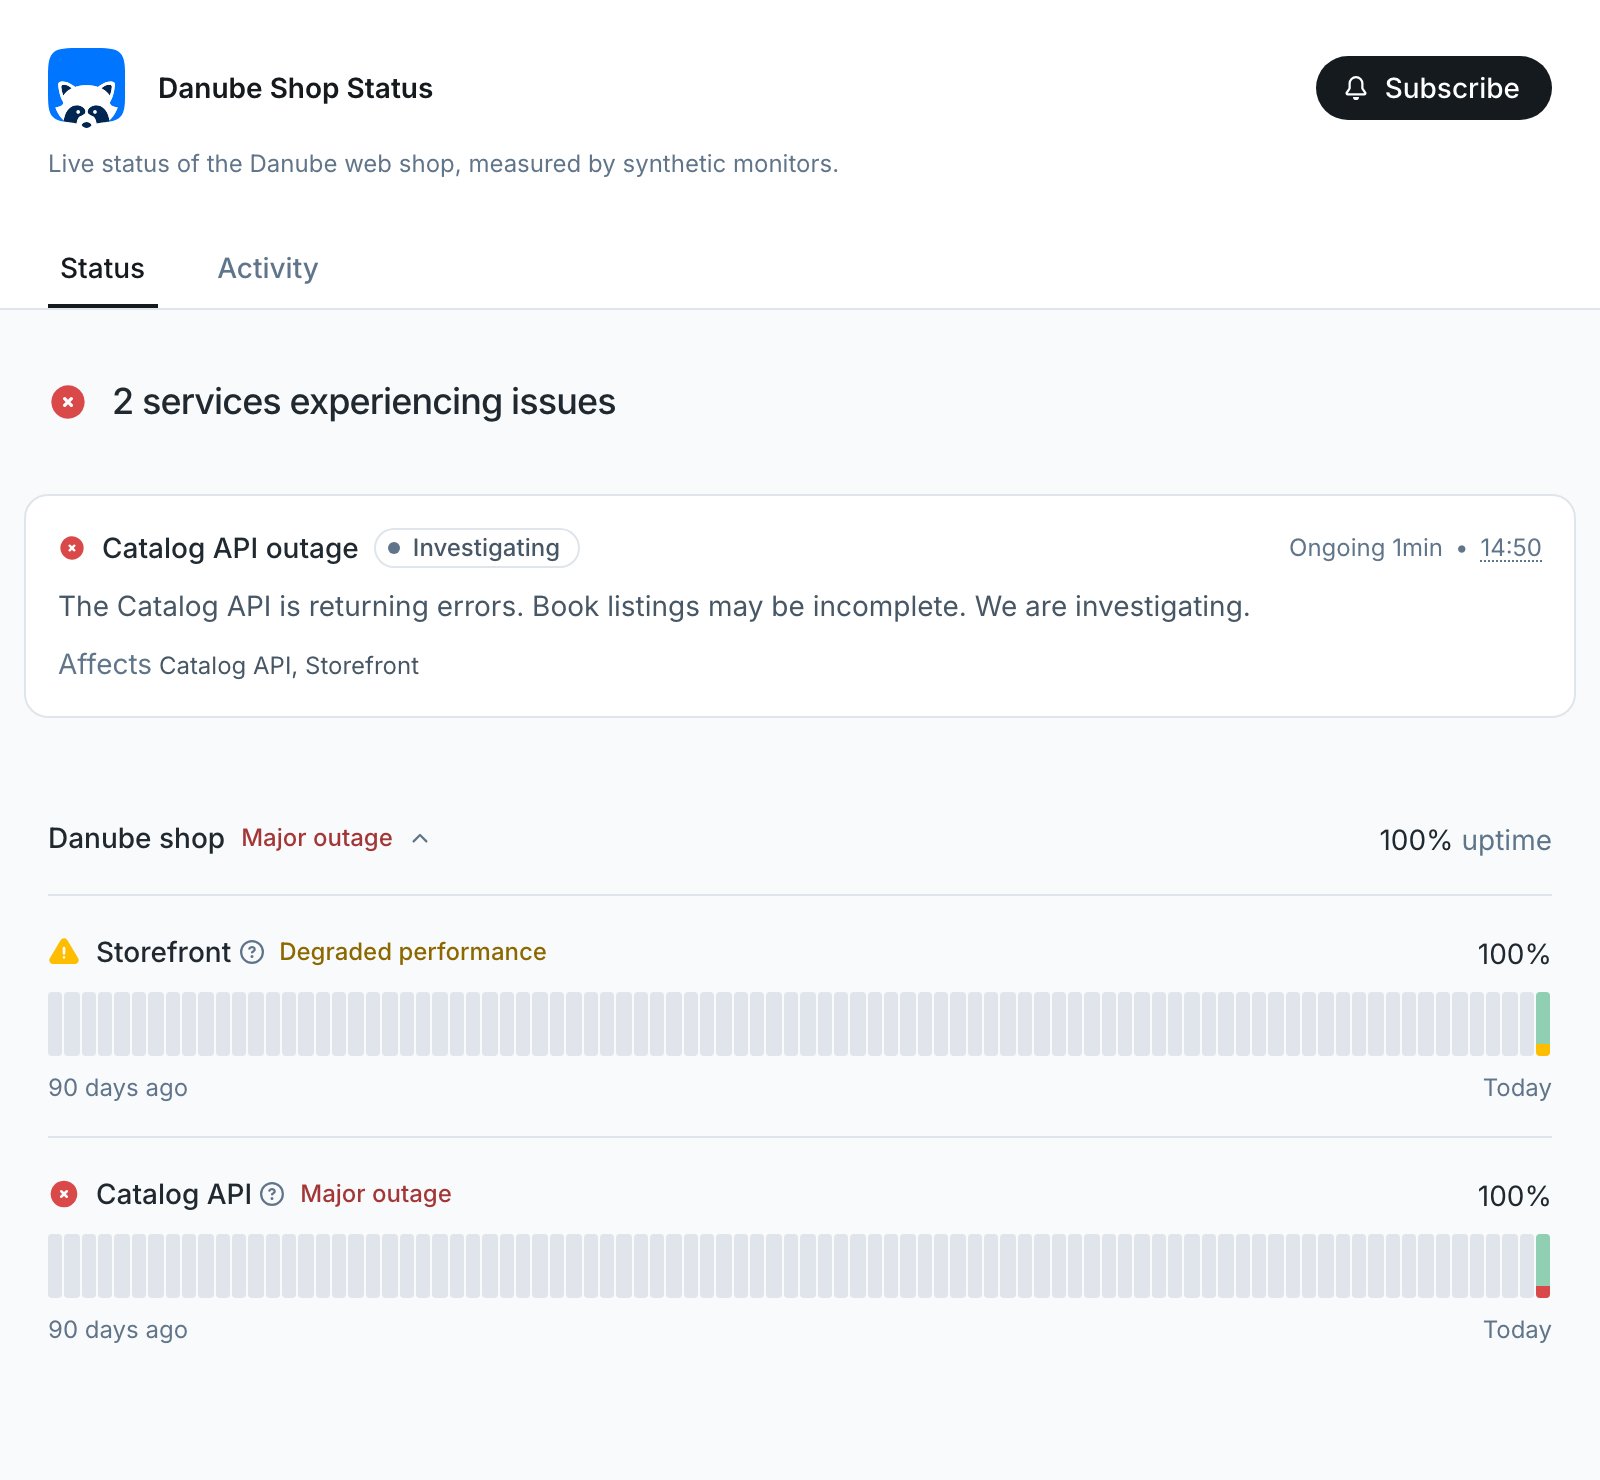
/api/books, so when the API fails, shoppers see it in the storefront before any storefront check fails. The rule says so on the page. Degraded performance does not lower the storefront’s uptime; only partial and major outages do. See uptime calculation.
Write firstUpdate and lastUpdate for customers, not for your on-call. They are posted to the public page and emailed to subscribers, because notifySubscribers defaults to true.
Incident automation is available on Team and Enterprise plans. View pricing
Terminal
Terminal
Terminal
Terminal
Terminal
https://<your-url>.checkly-status-page.com. Every component is operational.
Verify it works
Break the API check on purpose. Inchecks/books-api.check.ts, change statusCode().equals(200) to statusCode().equals(201) and run npx checkly deploy.
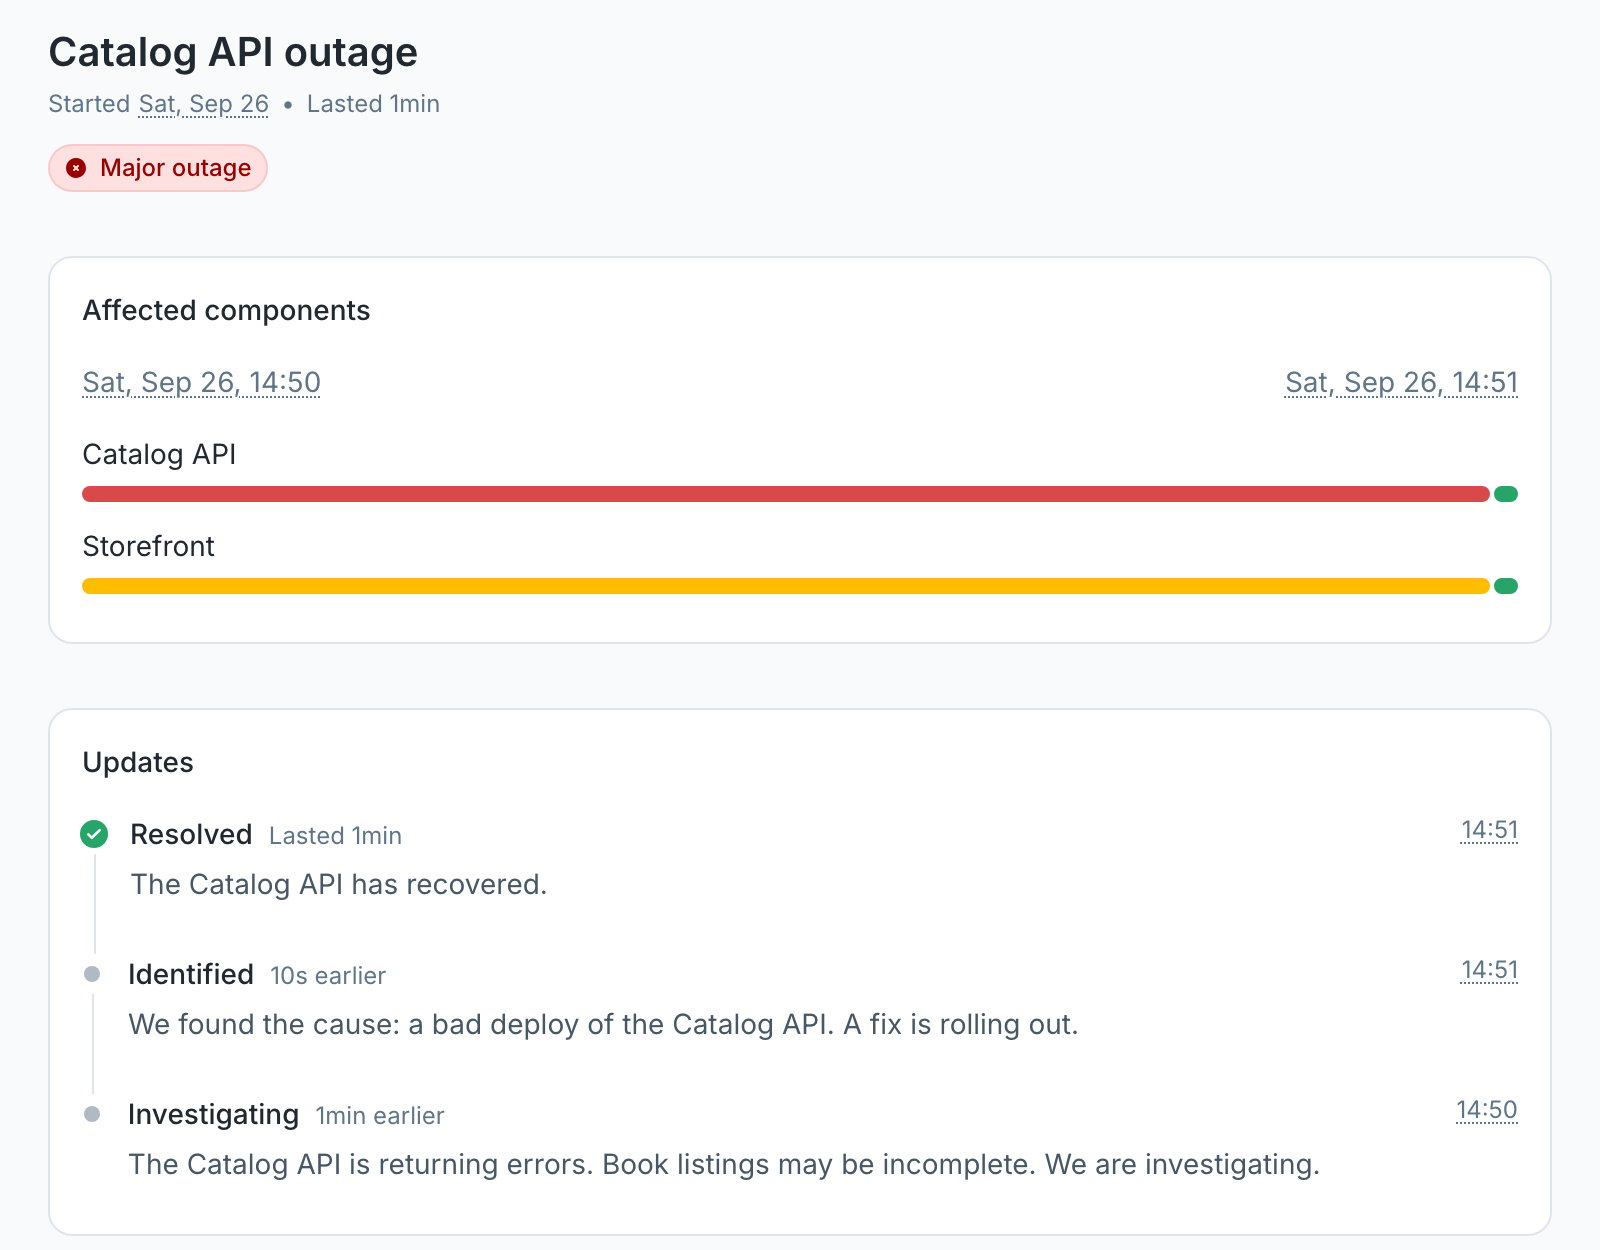
When the sample was deployed that way, the first run failed, was retried twice 30 seconds apart, and the incident opened about a minute after the deploy. The page in the screenshot at the top of this guide is what customers saw: Catalog API in major outage, Storefront degraded, and the first update from the rule.
Now read it from your coding agent through the Checkly MCP server:
Prompt
Catalog API: list books failing under the status-catalog-api tag, and reports that the API answered 200 OK while one of two assertions failed, after three attempts from N. Virginia. That is enough to tell a broken check from a broken API before you say anything more in public.
Once you know the cause, post it from the same session:
Prompt
equals(200) and deploy again. The next passing run resolves the incident with the rule’s last update, and the incident page keeps the full timeline: